Paper Angel
Angel Paper Doll
Christianity Oasis has provided you with this free paper Angel chain pattern and Angel paper doll pattern tutorial. We also provide Christian activities and Christian entertainment as to enLIGHTen your Christian walk path. Enjoy !!!

Proverbs 31:13
She seeketh wool, and flax, and worketh willingly with her hands.
Welcome to Christianity Oasis Crafts projects, part of our scripture based Virtuous Woman program, which is an amazing adventure for every woman.
Easy Paper Angel Tutorial
Free Angel Paper Doll Pattern
This is our absolutely free Paper Angel pattern download with a step by step Angel Paper Doll tutorial which has easy to follow instructions on how to make a Paper Angel chain.
Paper Angel
Angel Paper Doll
Materials you will need:
- Paper
- Sharp Scissors or Safety Scissors for children
- Double sided or foam tape (optional)
- Decorative background paper (optional)
- Picture frame (optional)
Print the Angel Paper Doll Pattern
Please read all paper Angel instructions before beginning your angel paper doll chain.
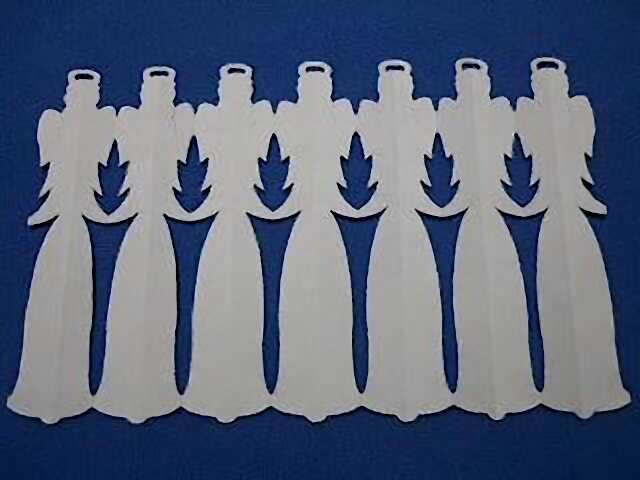
Step 1. The pattern fits on one piece of standard or A4 copy paper. You can fold and cut the paper doll angels on the same piece of paper that you print it on, or trace it onto other paper if your printer will not accept the paper you choose to use. The completed cutting measures approximately 6 inches tall by 9 inches wide.
Download the free Paper Angels Pattern here.This is a screenshot of the download:

Note: The instructions for the Angel paper doll chain are not included on the paper Angel pattern itself.
Folding the paper Angel
Step 2. Cut the edge of the paper off even with the side of the Angel paper doll pattern (indicated in photo by the red line).
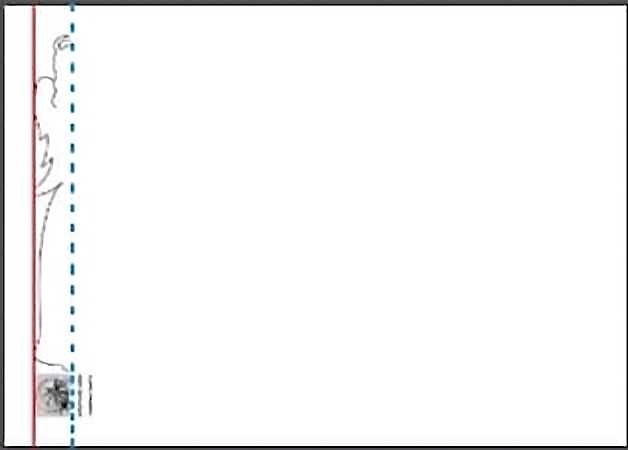
Fold the paper along the inside edge of the paper doll angels pattern (indicated by the dotted blue line) with the printed side on the outside of the fold. Continue to fold the paper as you would fold a paper fan. The pattern will make a chain of 7 paper doll angels across a regular size sheet of copy paper (8½ x 11inches or size A4 paper). Of course if you wish to have a chain of fewer paper doll angels, only make as many folds as you desire.
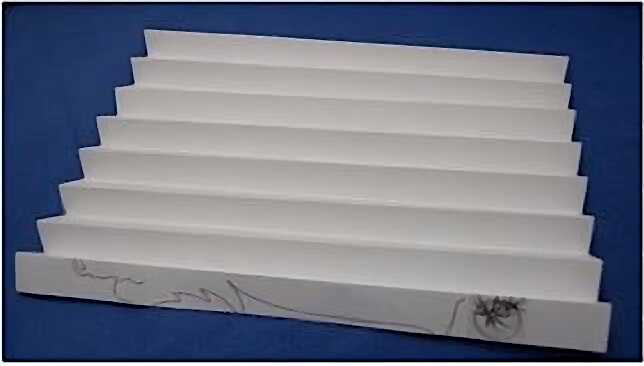
Angel paper doll pattern Note: When folding your paper, it seems that after the first fold, the tendency is for the consecutive folds to come out just a hair wider than the last. It's a good idea to practice making a few folds on a separate sheet of scrap paper before folding your paper with the Paper Angel printed pattern on it.
Paper Angel Tip: If you want to make your folds as straight as possible, lay the paper on a smooth flat surface. Place a ruler along the fold line and run the blunt side of a butter knife (not the serrated side) along the straight edge of the ruler with just enough pressure to lightly score (not cut or tear) the paper. This will provide a nice straight edge that will fold easily when you gently squeeze it together.
Step 3. Once you have the desired amount of folds, cut the paper even along the last edge.
Hebrews 13:2
Be not forgetful to entertain strangers: for thereby some have entertained Angels unawares.
Cutting out the Paper Doll Angels
Step 4. Sharp scissors help tremendously when cutting out Paper Angel dolls. Curved fingernail scissors are excellent for this craft as they make it easy to cut curves and sharp angles. However, children should use rounded end scissors for children when cutting out the Paper dolls. Simply cut along the lines of the paper paper Angel pattern, leaving the open spaces at the top and bottom of the wings and the bottom of the gown uncut so that the Angel paper doll chain remains attached to one another at these areas.
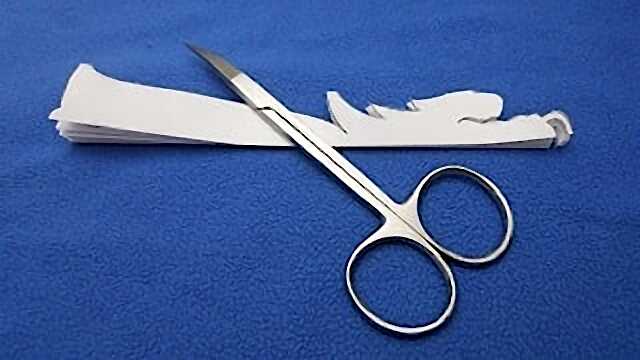
Note: Work slowly as this is a delicate project, especially around the halo. It is very easy to cut too far if you cut too quickly.
Step 5. After cutting, carefully unfold your paper Angel chain and flatten them by pressing the folds of the paper open with your fingertips.
Ideas for your Paper Doll Angels:
These paper angel chains are a fun project for children; however, you can also cut your paper angels out of onion paper or any other type of decorative paper, then attach them to a contrasting color of background paper and frame them for a handsome and elegant gift or heirloom.
The thinner your paper is, the easier your paper doll angels will be to cut, however it will also tear more easily, so use caution and handle them gently.
Be sure to always test on some scrap paper before using any kind of glue on your paper doll angels, as some glue will show through or wrinkle the paper when dry. Double sided tape is one option for attaching your paper doll angels to a background and double sided foam tape also works very nicely, as the paper doll angels are held up off of the background paper and cast a faint shadow on the background paper which gives a nice effect.
If you like this Angel Paper Doll project or know someone who would, please pass on a link to this Paper Angel page or feel free to include a link on your website.
God Bless.
If you like this Angel paper doll pattern project, you will also like our Jesus Tracing pattern and tutorial. Click the link below to create a project with a lovely Jesus Tracing for yourself or a loved one:
Thank you for visiting our Dew Rag pattern and tutorial project.
More creative craft ideas at the link below:
Copyright © 2000-2025 All rights reserved.

Living Water at Christianity Oasis
John 7:38 He that believeth on me, as the scripture hath said,
out of his belly shall flow rivers of living water.

Learn how the Christianity Oasis Ministry was created by the Hand of the Lord. A true story of unconditional Love, Mercy and God's glorious Grace.
Excellent Christian Resources
Aunt Annie's Crafts ... How to Make Paper Angel Chains - Angel Paper doll - Create a chain of paper angels by cutting multi-folded paper strips. It's just like folding and cutting paper doll chains!
Danielle's Place ... Bible Crafts - Paper Angel. How to make paper Angel crafts for Sunday school and Children's ministry. ... Card Stock, Printer Paper, Colored Pencils or Crayons and Glitter or Glitter Glue.
Dreamy Posy ... Angel Template printable (Super Easy Christmas Craft), Tutorial to make paper angels from the angel template printable. Simple materials can create beautiful angels.
Etsy ... Angel Paper Doll - Check out our angel paper doll selection for the very best in unique or custom, handmade pieces from our shops.
Holy Spirit ... Ask the Holy Spirit to help you create paper doll Angels. He is very creative and you can be too.
Paper Angel ... Personalized Rubber Stamps Home Page. Beautiful & unique personalized rubber stamps, art rubber stamps & cool custom address rubber stamps by Paper Angel.
Sunday School Crafts ... Angel Paper Doll Craft. Luke 15:10- Likewise, I say unto you, there is joy in the presence of the Angels of God over one sinner that repenteth.
Twinkl USA ... Paper Angels Craft Template - Paper Angels pattern - Get creative with our printable paper craft Christmas Angel template. Cut and fold to make paper Angels.
If after you are completed with the Paper Angels project design of a easy to make Angel paper doll chain with Angel paper doll pattern, you can also check out some of the other Christian entertainment, games, music, books, mall, studies and programs within our Christian community below:


